How to use Story2Vid Storyboard to make longer AI videos
Learn the step-by-step process of creating videos longer than 10 seconds by combining multiple AI-generated clips using the Story2Vid Storyboard editor.
Mastering Long-Form AI Video Creation with Storyboard feature
AI video models like Sora 2 and Veo 3.1 typically generate clips that are 8-10 seconds long. To create a full narrative video for YouTube or a long-form social media post, you need a robust sequencing workflow. Story2Vid's Storyboard mode provides a visual editor to seamlessly combine these individual clips into a cohesive, longer video.
Here is the step-by-step guide to creating videos longer than 10 seconds using the Storyboard.
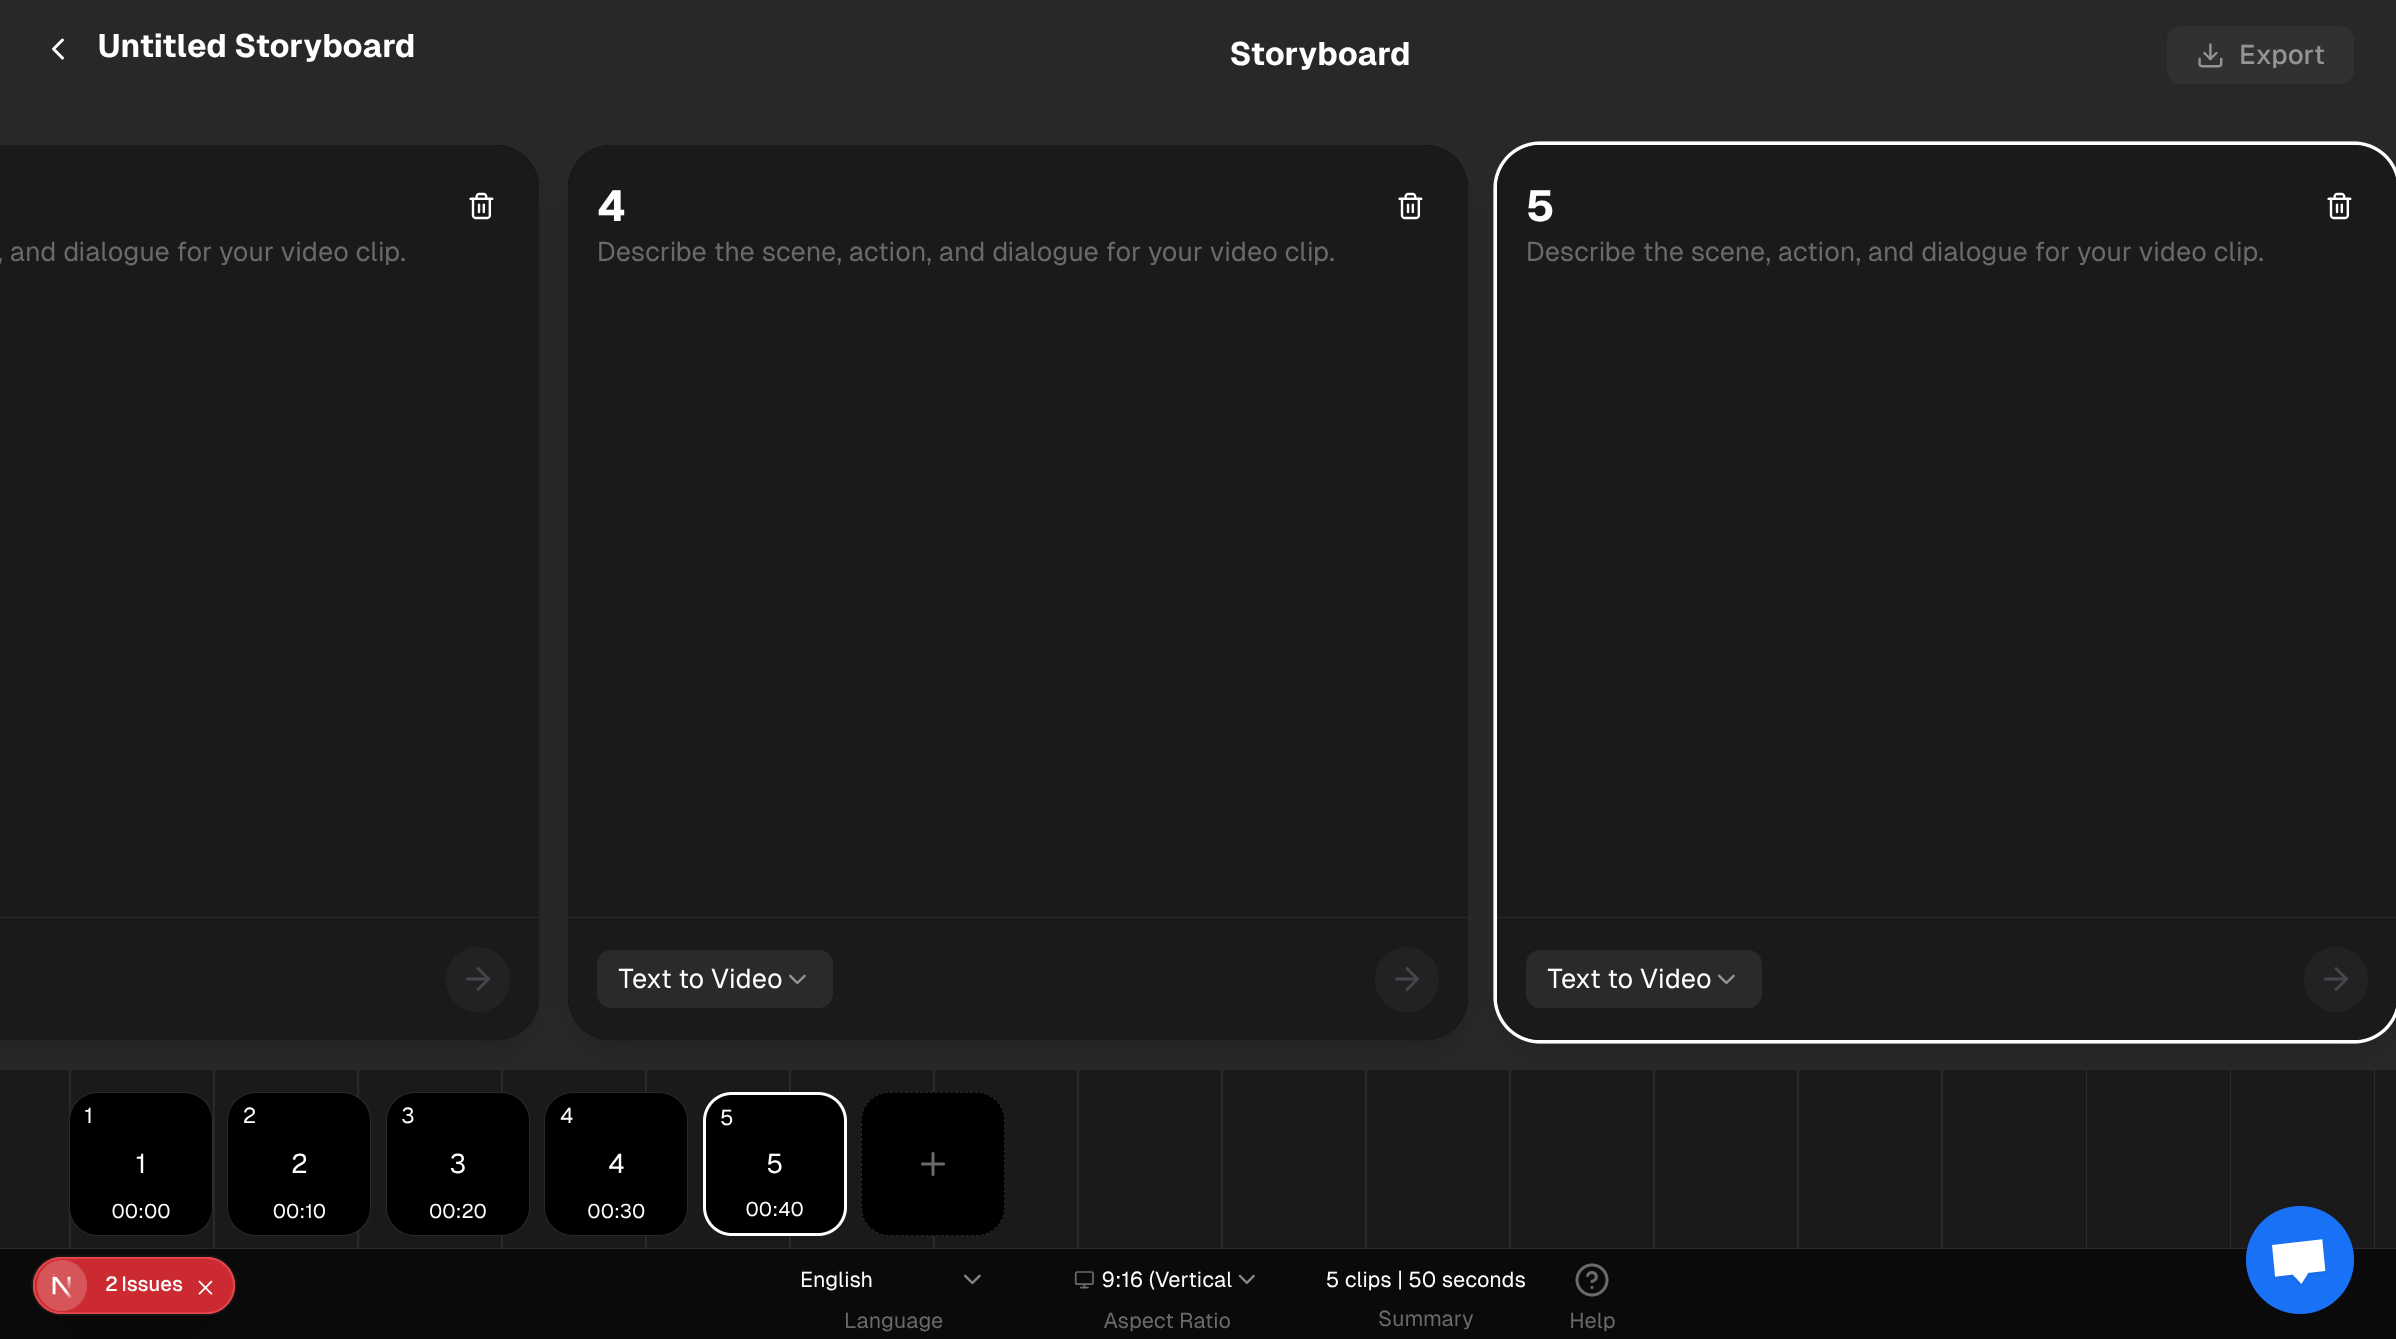
Step 1: Access the Storyboard Editor
Navigate to the Quick Videos section of your dashboard and select either Sora 2 or Veo 3.1. Click the Storyboard button to start a new project or resume a draft.
Tip: Plan Your Narrative
Before generating, outline your story. A 60-second video requires approximately 6-8 clips (depending on the model).
Step 2: Configure the Project
In the Storyboard editor, set the global parameters:
- Set Language: Use the language selector at the bottom to define the target language for any dialogue in your clips.
- Set Aspect Ratio: Choose between 9:16 (Vertical) or 16:9 (Horizontal). This ratio is locked after the first clip is generated.
Step 3: Generate Clips Scene-by-Scene
For each clip block, follow these instructions:
A. Write the Prompt
Enter a detailed prompt describing the scene, action, and any dialogue.
B. Add References (Veo 3.1 Only)
If you are using the Veo 3.1 Storyboard, you can select up to 3 reference images (characters, objects, or scenes) from your Image Library. This is crucial for maintaining visual consistency.
C. Generate the Clip
Click the Arrow Right button on the clip block. This submits the job to the AI model.
Best Practice Tip: Wait for one clip to complete before generating the next. This allows you to review the output and adjust the prompt for the next scene to ensure smooth transitions.
Step 4: Monitor and Review
The clips will process in the background. You can safely leave the page.
- Processing: The clip block will show a spinning loader.
- Completed: The clip block will display the video preview. Click the preview to watch the full clip.
- Failed: If a clip fails, credits are automatically refunded. Review the error message and click the generate button to retry.
Step 5: Combine the Final Video
Once all clips in your storyboard show a green "Completed" status:
- Click the Export button in the top right corner.
- Confirm the combination cost (typically 5 credits).
- The system will combine all completed clips in the order they appear in the timeline.
The final video will appear on your main Sora 2 or Veo 3.1 page with a "Completed" status and a download link.
Conclusion
The Storyboard mode transforms short AI clips into professional, long-form narratives. Start experimenting with scene sequencing and character consistency today!